Hayden & Christina and their “Wildheart Bengals” catery. They have one of the out door enclosures built a second smaller one is going to be built soon. But first needs an indoor version for the kittens and an extra door to stop the cats getting out etc. Now they are converting their spare room for this. So we have to think of a few things, but there is a rough plan. (Well Hayden has a plan apparently)
Apparently they are getting their queen on Monday so we need at least the door up… which is now done. But would like to get as much of the kittenary (ok Kitten nursery but hey) done as possible as don’t want to disturb the queen if she gets preggers and has kittens…
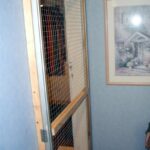
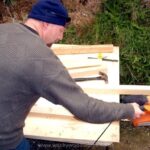
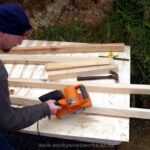
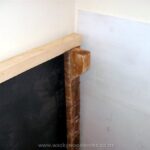
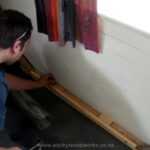
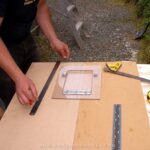
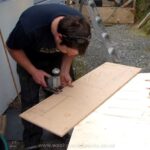
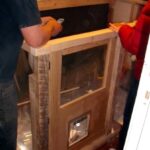
First get old aluminum door frame from old sliding door cupboard. Add lite weight wooden sub frame, and some hinges. Cool idea Hayden simple, lite weight and easy.
All we did to hang it was tex screw 30mm x 10mm to the door frame and then add hinges to that. This way it is minimal damage to house and can be putty filled and painted over if they sell and move.
-
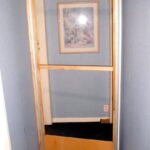
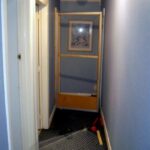
- Door now closing the kittenary off. Leaving office and hallway open.
-
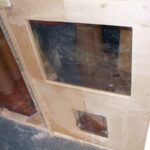
- Other latch on kittenary…
-
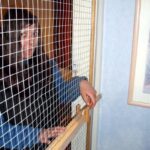
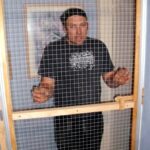
- Umm told you need plastic cover… oh never mind…
It needs to swing so it can be opened both ways. I thought it had to swing a full 180 which we ended up making it do and has worked out for the better. The door is going to be used as a interlock so cats and or kittens can’t get out.
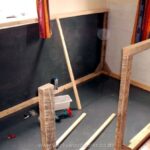
Past the door to the right is kittenary and to the left is the office. When the door is in this postion and both office and kittenary doors are open the queen bengal can freely roam in between.
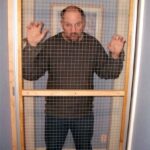
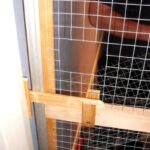
Hayden cut mesh out… I was to busy drinking bourbon… Add mesh to door, simply stapled on with heavy duty staple gun… let me out. let me out. Oh wait its not locked… doh!
Door now closing the kittenary off. Leaving office and hallway open.
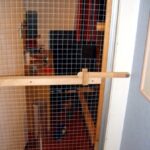
My simple latch (on hallway) that can work either side of door and on both doors and it does not matter what side of the door you are on. Small hand hole in mesh to reach through. Just needs some plastic cover to protect hand on sharp bits of mesh. Which Hayden will do, like he did on his out door enclosure.
Cut latch with jigsaw rounded so easy to move and smoothed off with belt sander. Drill bigger hole than tex screw add washer and you have a latch.
Oh just to point out… we didn’t have any washers… so we made some out of… oh wait… you have to visit to see them. They were the most expensive part used so far.
Also to point out that this is Haydens project and he is doing most of it… I am the helper and tool supplier on this one… 🙂
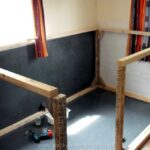
We also have to eventually put a small ledge so the queen bengal mum cat can get out the window in to the second out door enclosure. (which also has to be built.) But again can be built later on.
-
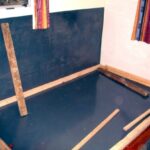
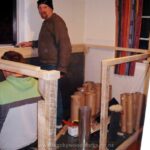
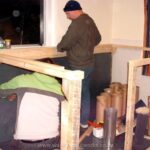
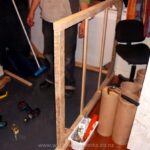
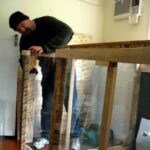
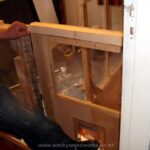
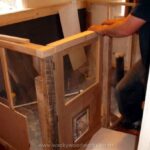
- Plastic base and wooden frame
-
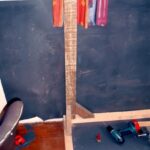
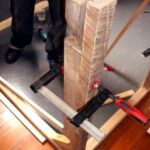
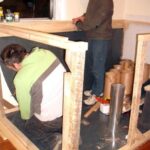
- Make corner posts and corner braces.
-
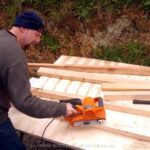
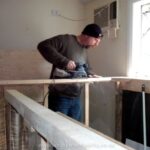
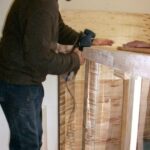
- Nighthawk belt sanding recycled wood
-
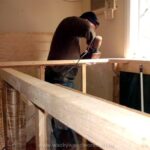
- Nighthawk belt sanding recycled wood
-
- Nighthawk belt sanding recycled wood
-
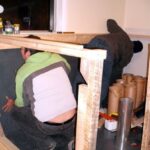
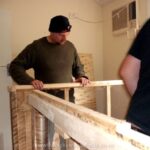
- Posts up,
-
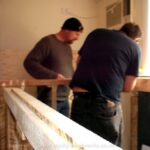
- Hayden tex screwing in blocks for side top plate
-
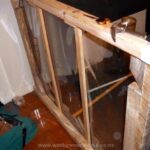
- Top plates on.
-
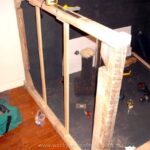
- After thought… need something to staple plastic sheet to.
-
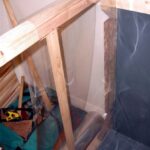
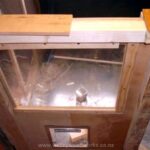
- Puting up back plastic wall
-
- Hey who taking photo’s?
-
- Hmmmm
-
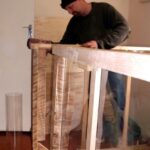
- Need to shave a bit off…
-
- Make battens and small back blocks to hold and give some strength to veiwing plastic.
-
- Battens done… coffee?
-
- First drop needs a trim.
-
- One wall done.
-
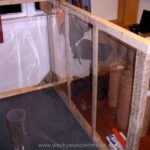
- Other wall done. Just like a bought one.
-
- Putting back blocks for battens for last wall.
-
- Opps boss is watching… making it look I am working…
-
- Thinking about what to use for top skirting…
-
- Working out what we will use for making the top skirting with.
-
- Top skirting on, sanding… damn that is smooth.
-
- Sanding off sharp edges
-

- Sanding and securing top skirting
-
- More sanding
-
- Damn I do I alot of sanding.
-
- Cutting the cat door, using straight edge to cut with circular saw.
-
- Cat door swung open now blocks entrance.
-
- Cutting the cat door, using straight edge to cut with circular saw.
-
- The cat door in the cat door.
-
- The cat door in the cat door.
-

- Measure after you cut… no wait cut first don’t measure… ummm???
-
- Cutting out the cat door out with jigsaw in the cat door and the cutt out the area for plastic view window. Then sand… guess who did that…
-
- The cat door with a cat door. Personally we wanted to put a third cat do in so it would be a cat door in a cat door, in a cat door..
-
- Didn’t have enough wood… we get more later and finish properly… Not only that we couldn’t get the bow out of one of the pillers by the cat door which makes it difficult to get purrrrrrfect… but it worx. It is recycling after all and we have to work with what we have got.
-
- Cat door in a cat door in a catery…
The idea being that with this and the door we put up on Friday, it will make it easier to control where the cats are and less chance of them getting out. Visitors and possible buyers of the cats can now come in a view the kittens easily as well.
So why the cat door in the cat door, well since this is where mum will have her kittens she can still use the cat door to roam the full indoor enclosure when the hall door blocks the hallway. The kittens won’t be able to get out and roam till they are about 5-6 weeks. Then they can lock the lower cat door as mum can still jump up and over the top rail. By time the kittens can do this, then they can roam in and out of the indoor and out door enclosures. (and hopefully sold by then.)
In total I believe there is about 15 holes we had to drill into the actual house and 95% of them was the hallway door. Over all we had the tools to do the job, I really should have bought the mitre saw over. However it would have been easier ripping and making the skirting and battens if I had a table saw.
We had fun converting the bedroom, to a kittenary and am waiting for the call to make the second out door enclosure from the kittenary. But it was a bit of a rush job.
Tools Used
-
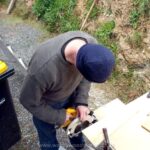
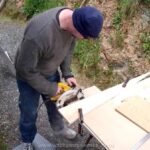
Jigsaw. Hayden’s borrowed from his work. Cutting stuff.
-
Circular Saw. Cutting stuff. Could have done with the mitre saw but well it was a rush job and all. With the fence also to rip to make battens and skirting.I just grabbed tools off the shelve.
-
Belt Sander. Smoothing and rounding off corners. Smoothing the rough cut timber.
-
Orbital Sheet Sander. Ummm finer sanding
-
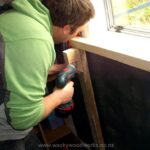
Cordless drill. Hayden’s Bosch and my Makita. One with pilot drill and one as a screw driver for tex screws. Makes it easier not always swapping and changing bits.
-
Clamps. Hold while cutting and tex screwing together, as well as used to push staples in.
-
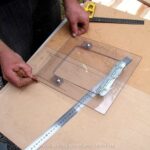
Steel rule/Tape measure. Measuring stuff
-
Square. Squaring stuff…
-
Hammer. Nailing stuff.
-
Staple Guns . Hayden’s and mine, stapling mesh and plastic sheets to frame.
Hand saw: General cutting here and there.
Bacho Pro Cut: Angle cut for the rafters
Wish we had for the job to make easier
- Table saw for ripping battens. But didn’t need just would have been nice.
- I should have bought the mitre saw.


Umm told you need plastic cover… oh never mind…
Door now closing the kittenary off. Leaving office and hallway open.
So far Hayden has done this. Plastic base and wooden frame. Plastic up the walls as well. The plasitc base? Well untrained cats… makes easier to clean up I guess. We will build small frame and line it with plasitc sheets. Then put in a gate. The plan is also for them to have tower thingy they can play on, sleep on and climb all over with carpet and… well you get the idea. But that can be built later on.